Your Ad Here
Showing posts with label xbox modifiction. Show all posts

Tuesday, September 4, 2012

TUTORIAL: Repair A Frayed Controller Cable!

We have all, at some point or another, experienced this. Whether it's our own controller that just got worn, a recent eBay or craigslist purchase, or a friend or family members' controller. Time to put away that nasty old Duct tape. No more using electrical tape! Do it the right way...

Xbox Modification, Repair and Tutorials


Start with your controller with the frayed end.
Xbox Modification, Repair and Tutorials

Cut the cable right after that blocky thing (I don't know what else to call it). Get as close as you can using side cutters, or "dikes".
Xbox Modification, Repair and Tutorials

Xbox Modification, Repair and Tutorials

Locate and remove 7 screws. Normally the 7th screw is under a sticker. In this case, the sticker has already been removed.
Xbox Modification, Repair and Tutorials


In this example, you can leave the PCB (Printed Circuit Board) in the lower half of the shell.
Xbox Modification, Repair and Tutorials

Clip the cable on both sides of the boot.
Xbox Modification, Repair and Tutorials

Preparing the boot: You're going to want to remove everything from inside the boot. I used needle nose pliers to pull out the wires and shielding. I used a combination of an x-acto knife and a dremel to remove the original cable shrouding.
Xbox Modification, Repair and Tutorials

Xbox Modification, Repair and Tutorials

Remove the shroud and shielding from the wires attached to the PCB. Cut to size, strip and tin.
Xbox Modification, Repair and Tutorials

Cut your controller cable at a 45° angle and thread it though the boot.
Xbox Modification, Repair and Tutorials

Xbox Modification, Repair and Tutorials

I got a little ahead of myself... sorry.
Pull the boot back, strip and tin the wires. Solder the corresponding wires from the cable to the wires on the BCB. Use heat shrink to seal everything. If you notice in this picture, I used several pieces of heat shrink to make a "stop" that sits right in front of the boot to keep everything from pulling out.
Xbox Modification, Repair and Tutorials

Screw the shell back together and enjoy your newly restored controller!
Xbox Modification, Repair and Tutorials

You can apply this concept to ANY controller for the xbox... not just an s-Type. Doing this WILL shorten your cord by at least 3 inches, but hey, no more "sweet spots", no more sticky duct or electrical tape, no more fighting over the "good" controller.

Enjoy!

TUTORIAL: Add a USB Port To Your Controller!

Every once in a while we need an extra USB port for our xbox's. Some of us just NEED a USB port period! There is ALWAYS A solution...


I originally did this mod because I need to get a gamesave to a thumb drive via the Pro Action Replay software on my PC and didn't have a memory unit. Since then, I have done this mod for a few people and they use it for a variety of things. Let's start!

First I started with an official Micro$oft controller.

I wanted to put the USB port in the upper, or top, memory card slot.

Locate and remove 7 phillips screws. #7 is usually under a sticker. In this example, the sticker was already removed.


Remove both pieces of the shell, the buttons, the rumble motors etc.. and set aside. you should be left with the naked controller PCB (Printed Circuit Board).


Find your USB port and solder wires to each pin, about 1 - 1.5" long. In this example, I used standard colors harvested from a scrap piece of USB cable. You can also use scrap IDE cable for a cleaner look.

Orient your USB port in the memory card slot and thread the wires through the opening in the top.

Sorry for he blurry picture. Solder your wires to the memory card leads as follows:


For added protection (you really don't need it, but what the hell?) add a dab or line of hot glue to the top and bottom of the USB port leads to seal the connections.

While your adding hot glue to the under-side of the leads, add a good sized gob of hot glue to the port itself and stick it in place. REMEMBER, if you don't have something plugged in when you stick it, the hot glue will seep through the USB port holes and make it nearly impossible to insert anything in. You'll be digging out hot glue with tweasers or an x-acto knife, possibly damage the inner leads.


Add a little bit of hot glue to the inside of the casing and stick your wires to the gob. This will keep them in place and free from getting the way when you put your controller back together.

Put everything back together and you should have something that loos like this:

Now you are free to use any compatible USB device on your xbox. Remember that thumb drives are hit or miss as to which ones will actually be compatible. The xbox can not recognize anything over 4gb (unless you format it into 4gb partitions. EG: an 8gb thumb drive can be partitioned into 2 separate 4gb "drives" that the xbox will recognize as 2 separate drives). You can use this n your PC with the XBCD driver to transfer game saves... etc...


Since this project, I have had to resolder and reseat the USB port. Amanda likes to charge her phone while she plays games. The constant movement of the controller while a heavier cable is plugged in, knocked the hot glue free and broke one of the wires inside the controller. That's not to say that this mod lasted over a year before I had to repair it.

Have fun!


NOTE: This was a junk controller when I first started this project. Don't worry about the controller cable being frayed. I will make a tutorial on how to fix that and link it HERE at a later date. You may also notice that controller button "A" has an LED in it. That was just me testing out the concept and has been removed completely.

Monday, September 3, 2012

Past Projects: The Los Angeles Dodgers Xbox


When my best friend, Kristina, asked me if I could make a custom xbox for her boyfriends birthday, I was like "Uuum... have you seen my Deceptacon xbox? What do you want?". "Los Angeles Dogers, I'll give you $150". "When do you need it?". "Day After Tomorrow..." All I needed to buy for this project was paint, primer and sand paper... I had everything else ready to go.

I started with a regular old, run of the mill softmodded console. She didn't want Media Center, or anything else... Just emulators and roms, so I went with UnleashX.

Since this xbox was in excellent condition, I did not need to sand before priming. I did, however, need to give it a good wipe-down with isoprophyl alcohol to get all of the grease and dirt off.


I primed all of the pieces that needed to be painted, inside and out. I wanted this thing to look like it was actually made by Micro$oft.

I painted the lid, base and button guard blue. I painted the faceplate and DVD bezel white.


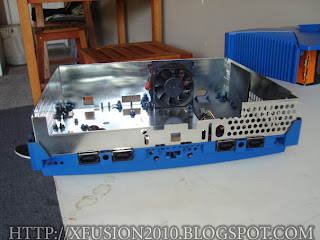
This shot is with the shielding, fan and controller ports in place. The contrast of the blue against the chrome is brilliant. Better that that dingy old blackish green.

I masked off the faceplate and DVD bezel, then I gave it a quick shot of blue. While I was at it, I shot the button assembly with white. So far, so good... Then I put the faceplate back together.


Next up was to cut out the "LA" logo from the lid...

I printed out the logo to the apropriate size...

Then I masked the fins and taped the logo down where I thought would be nothing less than perfect.


I cut the logo out, pushing the x-acto knife into the lid a little harder that I normally would to sort of "trace" or "etch" the logo into the lid.


Then I took my novelty, battery powered, Dremel (do not buy one of these, they absolutely suck) and drilled a series of holes around the inside perimeter of the logo on the low setting. After that was complete I kicked it up to the high setting and drug the bit from hole to hole, making sure to keep track of the inside of the "A".


Then I used nail files (dollar store) and my x-acto knife to clean up the edges and make the corners sharp.

After I was satisfied, I took the lid out back to be sprayed with 3 thin coats of white, letting it dry for about 15 minutes between each coat.


I let the final coat dry for about 2 hours. Long enough for me to change the P/E (power / eject) lights from green to blue and wire up all of the indicator lights. (network connected, network activity and HDD (hard drive) activity. I was also able to test the machine to make sure everything was perfect.

After the paint was completely dry, I removed the masking.

Then I cut a piece of "frosted" Lexan (plexi-glass) to back the "LA" logo. I simply hot glued it in place on the under-side of the lid. I attached the inner piece of the "A", again, with hot glue.

Originally I had planned to clear the jewel and light it up with blue LED's. Kristina came by to see where I was at in the project and asked me how long that would take. She needed it sooner than later, so we opted to just paint the jewel blue to match the rest. And the Dodger Xbox was born.

Kristina took Brad to a Dodgers game the next day and brought the xbox with them. When they were getting their coats out of the trunk of the car she asked him to get something from "that box". He opened the box, saw the xbox and, from what I was told, almost fainted. He loved it.

My work here is done...