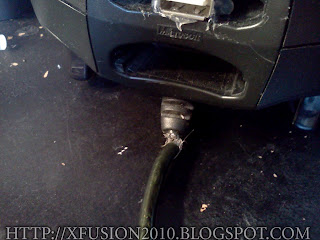
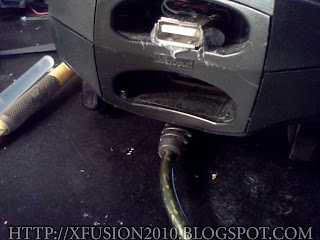
We have all, at some point or another, experienced this. Whether it's our own controller that just got worn, a recent eBay or craigslist purchase, or a friend or family members' controller. Time to put away that nasty old Duct tape. No more using electrical tape! Do it the right way...
Start with your controller with the frayed end.
Cut the cable right after that blocky thing (I don't know what else to call it). Get as close as you can using side cutters, or "dikes".
Locate and remove 7 screws. Normally the 7th screw is under a sticker. In this case, the sticker has already been removed.
In this example, you can leave the PCB (Printed Circuit Board) in the lower half of the shell.
Clip the cable on both sides of the boot.
Preparing the boot: You're going to want to remove everything from inside the boot. I used needle nose pliers to pull out the wires and shielding. I used a combination of an x-acto knife and a dremel to remove the original cable shrouding.
Remove the shroud and shielding from the wires attached to the PCB. Cut to size, strip and tin.
Cut your controller cable at a 45° angle and thread it though the boot.
I got a little ahead of myself... sorry.
Pull the boot back, strip and tin the wires. Solder the corresponding wires from the cable to the wires on the BCB. Use heat shrink to seal everything. If you notice in this picture, I used several pieces of heat shrink to make a "stop" that sits right in front of the boot to keep everything from pulling out.
Screw the shell back together and enjoy your newly restored controller!
You can apply this concept to ANY controller for the xbox... not just an s-Type. Doing this WILL shorten your cord by at least 3 inches, but hey, no more "sweet spots", no more sticky duct or electrical tape, no more fighting over the "good" controller.
Enjoy!


Hello there! This is my first visit to your blog! We are a group of volunteers and starting a new initiative
ReplyDeletein a community in the same niche. Your blog provided us valuable information to work on.
You have done a extraordinary job!
Take a look at my webpage ... http://www.allbabystores.com/Baby_166742011_Bedding
This comment has been removed by a blog administrator.
ReplyDeleteThis comment has been removed by a blog administrator.
ReplyDeleteThis comment has been removed by a blog administrator.
ReplyDeleteThis comment has been removed by a blog administrator.
ReplyDeleteThis comment has been removed by a blog administrator.
ReplyDeleteThis comment has been removed by a blog administrator.
ReplyDeleteThis comment has been removed by a blog administrator.
ReplyDeleteThis comment has been removed by a blog administrator.
ReplyDeleteThis comment has been removed by a blog administrator.
ReplyDelete