Your Ad Here
Showing posts with label misc info. Show all posts

Thursday, December 6, 2012

Tutorial: Replace your xbox controller cable with a USB cable

Replace Original XBOX Controller Cable With A USB Cable

Description:
What if you want to use a controller on your PC or laptop to play games or emulators, BUT you dont want to shell out a bazillion dollars for a PC gaming controller?

What if you modded your xbox and no longer have those big ugly, original, controller ports. Youre a minimalist and only have USB ports?

What if you just want to do a simple, cheap, fast mod just for the sake of doing it?

If any of the above scenarios apply, then this is the mod for you! Please read...

The Build:
Basically all you need to do this is a controller and a USB cable with an a-type male plug on one end. And of course a soldering iron, solder, wire cutters or "side cutters", heat shrink (optional), hot glue (optional)...
Replace Original XBOX Controller Cable With A USB Cable


First thing you're going to want to do is remove the screws that hold your controller together.
Replace Original XBOX Controller Cable With A USB Cable

Set your screws aside. I use shot classes. I don't know if you have seen them in the background of my other tutorials' photos, but they're extremely useful for not loosing small screws or small pieces.
Replace Original XBOX Controller Cable With A USB Cable

Now, locate where the cord connects to the controllers' PCB (printed circuit board). If you're doing this to an S-Type controller, the connector block is actually soldered to the PCB, so you'll have to clip the wires about and inch and a half away from the block. In this case my wires were soldered to the motherboard and were extremely easy to remove. Once your cable is free, set both the PCB and cable aside.
Replace Original XBOX Controller Cable With A USB Cable

You'll notice that I'm actually using a different cable that is pictured above. I realized that I have been looking for my mini USB cable for a couple of days now... ANYWAYS... Time to clip the female end off of the cable. Most people leave a small portion of the wires so they can use it later, but I have other plans for the female end.
Replace Original XBOX Controller Cable With A USB Cable

Replace Original XBOX Controller Cable With A USB Cable

Replace Original XBOX Controller Cable With A USB Cable

I trimmed about an inch, maybe an inc and a half from the end of the insulation. Now, this particular cable does not use the standard red, white, green and black. Instead it uses GREY, white, green and black. After testing the grey wire in fact was the VCC (red) wire and the rest were spot on.
Replace Original XBOX Controller Cable With A USB Cable

I added a little heat shrink, then stripped and tinned the ends of the individual wires.
Replace Original XBOX Controller Cable With A USB Cable

Remembering the order in which I de-soldered the wires, I re-soldered the new ones in place. It was a little tight, but not too difficult. Remember that the GRAY wire replaces the RED (VCC) wire. Also, please note, that I skipped a solder pad in between the green (D+) and the black (GND) wires. This blank pad is reserved for the original controller cables' "Yellow" wire. 
Replace Original XBOX Controller Cable With A USB Cable

You're going to want to somehow secure the cable to the controller case. Once that's done, you may now put your controller back together.

NOTE:
A friend came over while I was doing this project and distracted me a little. I forgot to photograph the fact that I used hot glue in place of my cable stop.  I'm sure you can see it in the following photos.
Replace Original XBOX Controller Cable With A USB Cable


Replace Original XBOX Controller Cable With A USB Cable


This picture shows the newly "USB-ified" original xbox controller plugged into my netbook. In the bottom right corner of the screen, you'll see that it was recognized, but unknown. I guess it's time to install the XBCD software and get this thing kicking properly!
Replace Original XBOX Controller Cable With A USB Cable

Here is the final product.
Replace Original XBOX Controller Cable With A USB Cable


Disclaimer:
Be careful using a soldering iron. They're HOT. Your wattage should be between 15 and 25. It is good practice to use "Lead Free" solder (for health reasons). Never leave your soldering unattended, especially around small children or pets. 
Please be careful to NOT short out ANY pins on the controller port or USB cable. Shorting pins WILL cause your hardware to FAIL (sometimes permanently). Check and recheck your work before attempting to use it.

Monday, December 3, 2012

Japanese S-Type Controller

Classic Style Japanese XBOX S-Type Controller 

DESCRIPTION:
We all know that when the original Xbox was released, it had huge controllers, sometimes referred to as "The Duke", or "The Potato". Microsoft released smaller controllers for the initial Japanese release of the xbox. Eventually these made their way to the US as the Xbox S Controller. What we have here is the Japanese controller that was issued prior to the release of the S controller in the US! So, it's very rare in the States and completely compatible with the NTSC Xbox console!

FEATURES & DIFFERENCES:
- These controllers are the exact same size as their American counterparts.
- As stated above, they are completely compatible with NTSC systems (it is unknown, at this time, whether they are compatible with PAL systems).
- The controller "Badge", or "Jewel",  is green and features the word "XBOX" rather than the american version which featured a black jewel with the "X" logo above the word "XBOX".
- The buttons appear to be "more clear" than their American counterparts. They are the same color but the white backing insert is significantly more shallow and further away from the actual letter (A, B, X Y).
- The cord, also, seems to be a lighter green hue, rather than their darker green or black American counterparts.

The back of the packaging.

Classic Style Japanese XBOX S-Type Controller
Close up of an "un-boxed" Japanese S-Type controller. 


Classic Style Japanese XBOX S-Type Controller
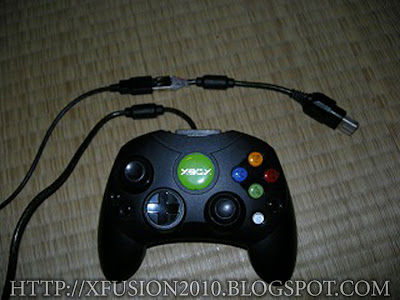
 A Japanese first issue S-Type controller in the real world. It looks to me like the owner of this controller has modified it to be used on a PC and still be compatible for use with a console.

This is a comparison with eh "Duke" and a Japanese S-Type controller.

VARIANTS:
It has been widely speculated there was a gray version of the Japanese S-Type controller. Not much information about this "speculated" controller exists today. However, I was able to dig up, once-and-for-all proof that they do, in fact, exist. There is no information as to how many were produced, or if they were issued with any particular console. I can only assume that they were sold separately as an accessory.

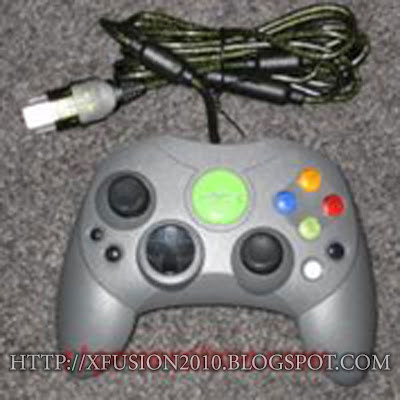
A loose gray version of the Japanese S-Type controller.

A packaged version of the "speculated" gray Japanese S-Type controller, proving that they do in face exist as an actual product of Microsoft, rather than a custom painted controller.


Thursday, August 30, 2012

Tutorial: How To Completely Take Apart Your Xbox

First and foremost. Please unplug everything from your xbox. You need to be sure that the power supply is completely discharged. If you're a little seasoned, you can actually hear the PSU discharge 5-15 seconds after you remove the power cord. You should hear a small, barely inaudible 'pop'. If you're new to this, you may want to wait 15 minutes to a half hour to be 100% sure.

Moving on... The tools you will need:
-Torx 20 (T20)
-Torx 10 (T10)
-Flat Head screwdriver
-Phillips with magnetic head (optional)

Start with a regular old xbox

Flip it over and locate 6 screws

Screws 2 and 5 are under security stickers. Breaking these stickers voids your non-existent warranty. Screws 1, 3, 4 and 6 are under the feet. GENTLY peel up the edge of the feet, only enough to expose the screw.

Set your screws aside

Using both hands, one on each side of the vents, GENTLY lift up. If it gives you problems, yell at it. If yelling at it doesn't work, gently wiggle and it should come free. Lift off and set aside.


Remove the IDE cable from the hard drive. Remove molex power from the hard drive. Navigate the power cables through the maze of clips and hang over right edge of the shield. Remove 1 T10 screw that attaches the hard drive caddy to the DVD caddy. Lift out the hard drive and set aside. Be sure not to rattle, shake, bump or drop your hard drive... seriously.


Locate and remove the IDE cable and the yellow cable from the back of your DVD drive. Hang cables over the rear of the metal shield. Locate and remove 2 T10 screws from the front left and front right of the DVD drive. Sometimes the left screw is hard to get out. This is where you might need the screwdriver with the magnetic head. Once the cables and screws are removed, simply lift the caddy out and set aside.


Remove the IDE cable and the yellow cable from the motherboard and set aside.

On the right side of the mother board you will find the PSU (Power Supply Unit). There are 2 screws and a series of slider clips holding it in place. After you remove both screws, please detach the molex from the motherboard. When the PSU is completely free, simply slide it towards the front of the case, lift up, remove and set aside. Please be sure that your PSU is unplugged from the wall and has been discharged completely before handling. See those big ass capacitors? Yeah... they hurt... Don't touch them, period.


Next up, remove your controller ports. They are held in place by 2 T10 screws each, one on either side of the assembly. The controller ports are connected to either a "daughter board" (version 1.0 only) or directly to the motherboard (versions 1.1 and above). Simply unplug, lift out and set aside.


Next we're going to want to remove the faceplate. First unplug the P/E board (Power / Eject) from the motherboard (yellow wires).

Using your flathead screwdriver, gently pry outward until you hear a pop. Do not pry too hard, you dont want to break anything. The faceplate will not come completely free until you release at least 2 of the 3 inner case clips. I would suggest the first clip you release be the one closest to the point where you used your flathead. The second clip being the center clip. Once unclipped, swing free using caution when threading the P/E cable through the hold in the chassis. Set the machine aside while we continue working on the faceplate.


Now, lets dismantle the faceplate. Using your flathead screwdriver, GENTLY... gently push down on the tab located in the bottom center of the P/E board. Once unclipped, the P/E board should swing completely free. Once free, you are able to remove the button assembly and the LED diffuser. Set aside.


The next step is optional. I would not recommend that you do this if you have clumsy hands. I cant even begin to tell you how many of these that I have broke, even being as gentle as I possibly can.

To remove the button shield from the faceplate, first locate 2 clips. Be extremely careful to not break them off. GENTLY lift them, one at a time, using your finger nail. Once the top 2 clips are free, there is one on the bottom. This one is not as brittle. Separate and set aside.


Moving back to the console, we're going to remove the fan. Unplug the fan from the motherboard.


The fan is held in place by two 2 stage clips (I don't know what else to call them). Using your flathead screwdriver, gently pry outward while lifting up in the center. You will hear / feel it click. Maintaining upward pressure, repeat this step on the opposite side.

Stage 2... Now that the fan is somewhat free, repeat the steps with your flathead. This time the fan will come completely free. Set aside.

You should now be looking at a nekkid chassis with nothing more than the motherboard and bottom shield. Locate and remove 11 screws, highlighted in red.

Once all of the screws are removed, gently lift up on the front of the motherboard, pivoting from the back. Once you reach a 45° angle, gently lift out.

Removing the shield seems simple enough, right? One more step... There is a pad on the right side of the shielding that protects the contacts in the bottom of the PSU from shorting out. The pad is glued, or attached to the shielding, so it cant come out completely. You want to lift out and the the left to bring it free from the clips. Once that is done, lift the metal shielding out. If it's giving you problems, yell at it. If that doesn't work, wiggle it a little bit until it comes free.

Now, you should have a completely dismantled xbox. Stand back and vast in its glory. Please make sure that your pets (dogs, cats, hamsters, rabbits or babies) dont walk, lay or urinate on your parts. Nothing pisses me off more than when a baby comes along and pisses on my xbox. Damn babies. ANYWAYS... Enjoy!


NOTE 1:
I realize that I did not cover removing the DVD drive from it's caddy or removing the HDD from it's caddy. I did not notice this mistake until the xbox was already put back together.

To remove the hard drive, locate and remove 4 T15 screws (T10 driver will work just fine). Lift drive out of caddy.

To remove the DVD drive, locate 2 clips on either side of the drive towards the rear. Unclip them one at a time. The front of the drive is attached by a simple "tube"... Just lift the drive from the caddy.

NOTE 2:
I have absolutely nothing against babies in general. Just babies that pee on things.